
This page serves as a comprehensive guide to help you through the initial setup process of your Cake Brand on the Bake Boost app. It will walk you step-by-step through creating your brand profile, updating your application settings, and configuring your product offerings to ensure that your brand stands out. Whether you’re just starting out or looking to enhance your existing setup, this guide will provide the detailed information you need for a successful launch on the platform.
You need to move to the navigation:
Settings #

Mail Setup #
Email Setup Instructions: #
Configuring your email settings is essential, as these will be used to send notifications to your customers and manage various campaigns. Effective email communication is vital for keeping your customers informed about your services and the status of their orders.
If you already have a domain name for your business, you can find the necessary settings in the domain control panel. If you do not have a domain yet, you will need to purchase one, such as BakeStores.com or SweetCakes.ca.
You have two options:
- You already have a domain with your business name that is appropriately configured.
- You need to purchase a domain to set up your new baking business.
Already have a Domain Name:
In this case, you need to log in to your Cpanel (Control Panel) by following the method below, go to step 5, and get the details that need to be entered to the below Bake Boost Settings Page:

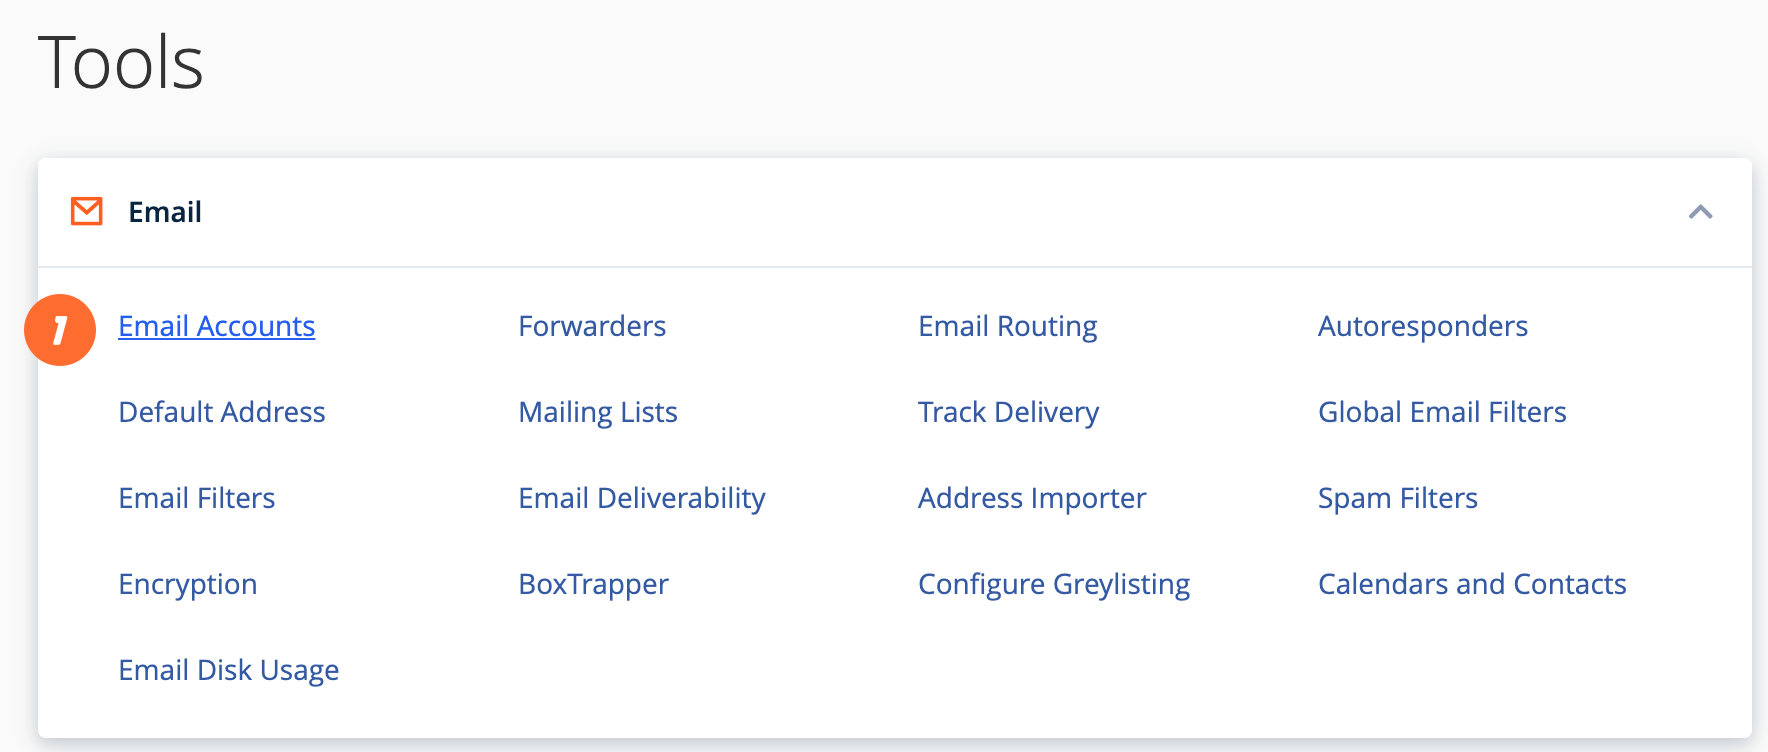
To locate the IMAP/POP and SMTP configuration details of your email accounts, log into your cPanel, head to the Email section and select Email Accounts:

Once there, locate the desired email account and click on Connect Devices:

You will find the IMAP/POP and SMTP Configuration under Mail Client Manual Settings:

Always use the Secure SSL/TLS settings
How to Set Up Email Accounts in cPanel from Domain Settings
Follow these steps to create and set up email accounts using cPanel from your domain settings:
Step 1: Log in to cPanel
1. Open your web browser and go to your cPanel login page (e.g., https://yourdomain.com/cpanel).
2. Enter your username and password provided by your hosting provider.
3. Click Log in to access your cPanel dashboard.
Step 2: Navigate to Email Accounts
1. In cPanel, locate the “Email” section.
2. Click on “Email Accounts.”
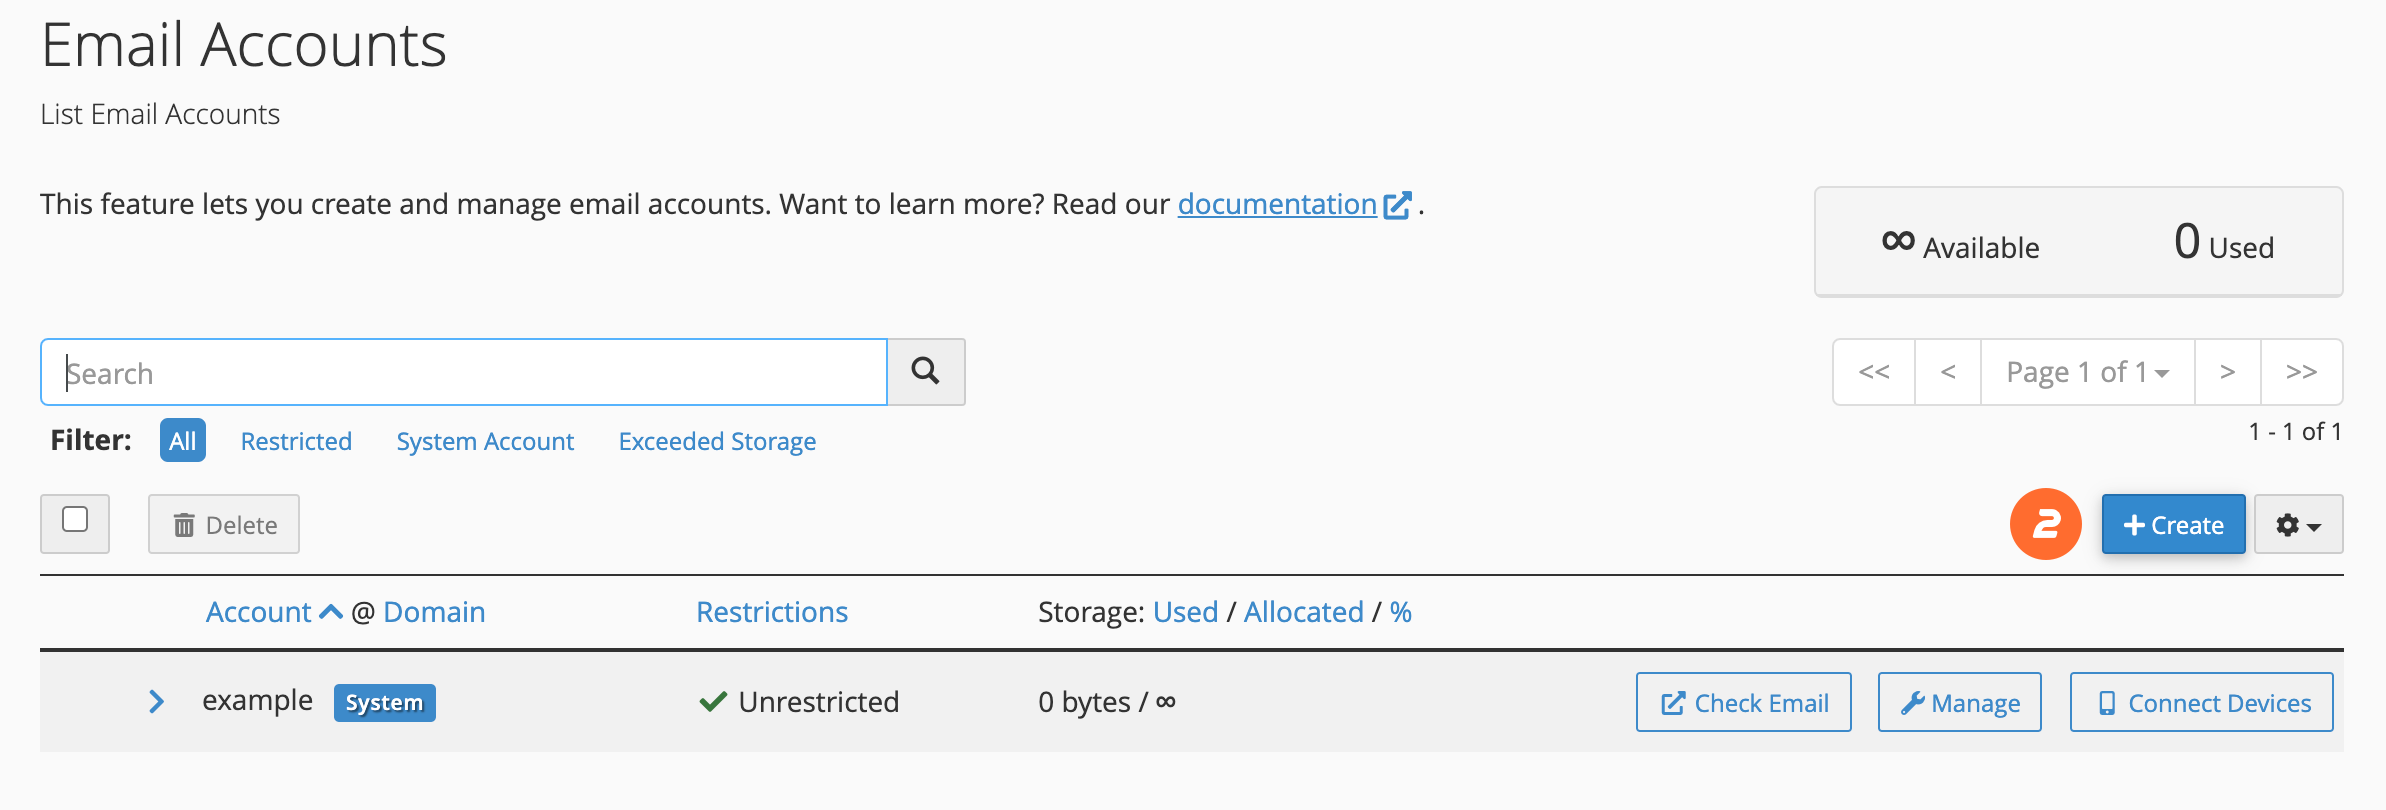
Step 3: Create an email account #
To quickly create a new email account, perform the following steps:
- Navigate to the cPanel’s Email Accounts interface (cPanel » Home » Email » Email Accounts).

- Click Create. A new interface will appear.
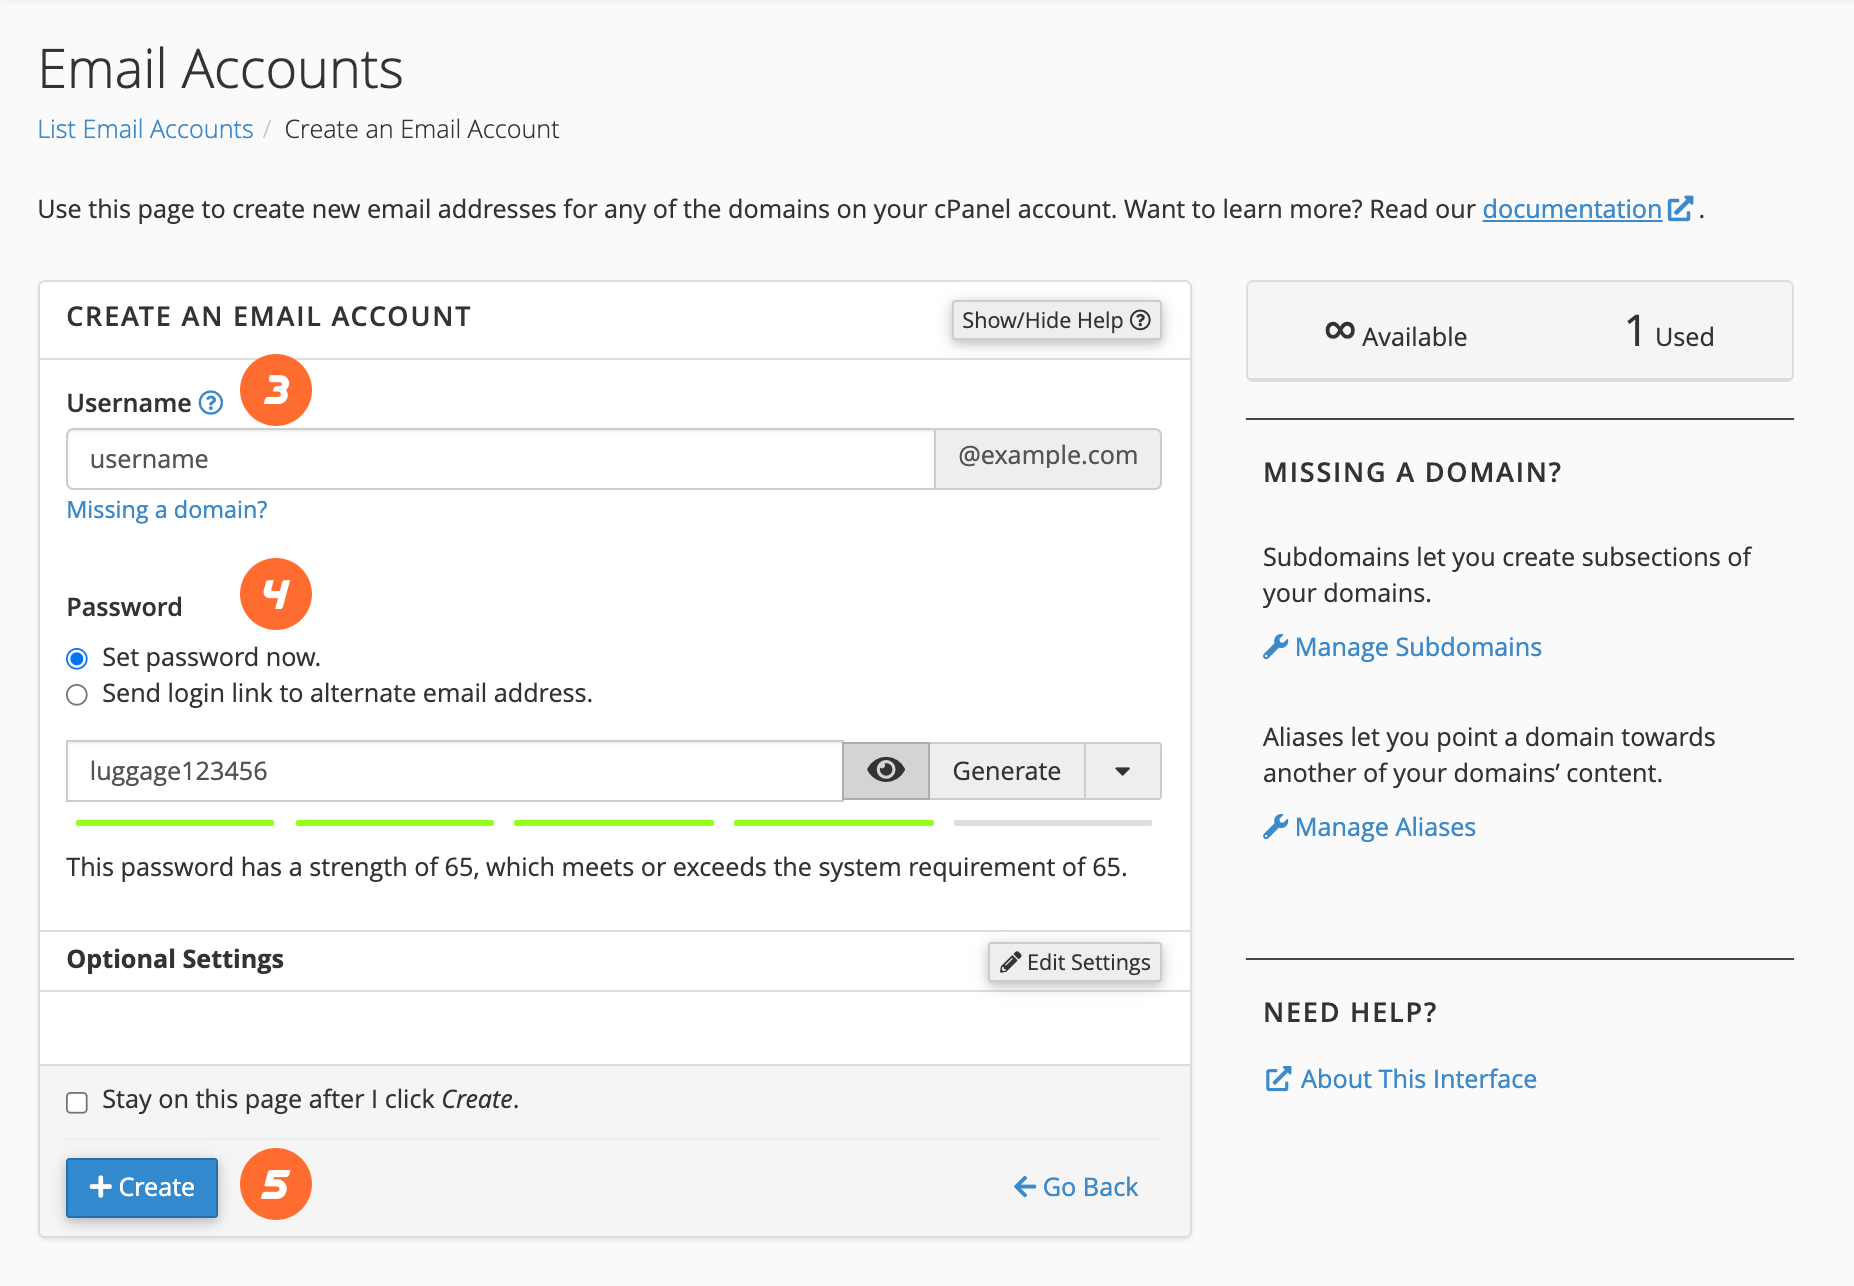
- Enter a new email address in the Username text box.
- In the Password section, enter a secure password in the Password text box.
- Click Create to create the account.
For more options and information about this interface, read our Create an Email Account documentation.
Sep 4: Use Webmail to check your account: #
To check your email account through Webmail, perform the following steps:
- Navigate to
https://example.com:2096in your preferred browser, whereexample.comrepresents your domain name. - Enter the username part of your email address in the Email Address text box (for example,
usernamefor theusername@example.comaddress). - Enter your password in the Password text box.
- Click Log in.
For more information, read our The Webmail Interface documentation.
Step 5: Configure a device to check your email #
To set up an iOS® or Android™ device to check your email, read from cpanel How to Set Up a cPanel Email Account on iOS® and Android™ documentation. It includes helpful steps and screenshots that will walk you through the process.
Step 5: Configure a client to check your email #
cPanel provides configuration scripts for many popular mail clients.
- Navigate to the cPanel’s Email Accounts interface (cPanel » Home » Email » Email Accounts).
- Click Connect Devices.
To locate the IMAP/POP and SMTP configuration details of your email accounts, log into your cPanel, head to the Email section and select Email Accounts:
Once there, locate the desired email account and click on Connect Devices:
You will find the IMAP/POP and SMTP Configuration under Mail Client Manual Settings:
Always use the Secure SSL/TLS settings


